
Reno Rot
The latest project at our place, a bathroom reno. Reno’s always produce something unexpected, this time it was dry rot at the hinge side of the bathroom door. It turns out water had been coming down the furnace B vent, and then continuing downward behind the door casing until it pooled on the floor, under the carpet, never leaving a visible trace, but causing a pocket of dry rot in the plywood floor. The floor in this area consisted of 5/8 plywood, overlain by a sub floor of 3/8 plywood. The dry rot had consumed the 3/8 plywood but had not penetrated through the 5/8 plywood. Plus the area of dry rot was located in an area that would not be subject to the weight of traffic, or any other stress for that matter. Thus I felt a non structural repair would suffice.
The latest project at our place, a bathroom reno. Reno’s always produce something unexpected, this time it was dry rot at the hinge side of the bathroom door. It turns out water had been coming down the furnace B vent, and then continuing downward behind the door casing until it pooled on the floor, under the carpet, never leaving a visible trace, but causing a pocket of dry rot in the plywood floor. The floor in this area consisted of 5/8 plywood, overlain by a sub floor of 3/8 plywood. The dry rot had consumed the 3/8 plywood but had not penetrated through the 5/8 plywood. Plus the area of dry rot was located in an area that would not be subject to the weight of traffic, or any other stress for that matter. Thus I felt a non structural repair would suffice.
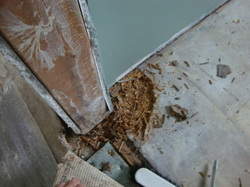
Looks pretty ugly after a couple bangs to loosen the rotted wood.
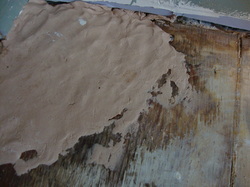
First I scraped away the dry rot. I was not that thorough on this, I hate working slowly, but I did get most of it. The area removed was very irregular in shape as well as in depth. As a first step in filling the cavity I cut a piece of 3/8 plywood roughly the shape of the cavity, but trimming it back so that it sat in the cavity but did not project above the surrounding floor level. Next I mixed up some epoxy, I used Cold Cure, and thickened it with wood flour. I could just as easily have thickened the epoxy with cab o sil or glass bubbles or micro fibers, but wood flour was what I had at hand. I then spread the thickened epoxy in the bottom of the cavity and pressed in the 3/8 cut to shape plywood, additionally secured with screws.
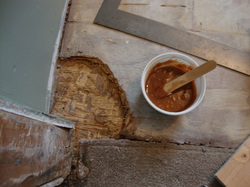
The cavity cleaned of rot, thickened epoxy ready to go in.
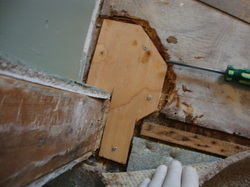
Plywood set into the thickened epoxy, and held in place with screws.
The next step is to fill the cavity up to the level of the surrounding floor. PlasticWorks sells a product called SculptWood, made by System Three Resins, the same company that makes Cold Cure. SculptWood is a two part epoxy putty with a mixing ratio of 1:1. Because the material is so thick I could not think of an easy way of measuring the parts to get an equal amount of each. So, I just scooped out a ball of part A, and by eye scooped out a matching ball of part B. By hand, using rubber gloves, I kneaded and mushed the two parts together until I had a uniform consistent colour. In my first attempt to apply this mixture to the cavity and to cover the 3/8 plywood I used a metal spatula, a wide putty knife. It did not work. As soon as the spatula passed over an area the SculptWood underneath would lift up and curl back toward the top of the spatula. I abandoned the spatula and resorted to using my hands to press the SculptWood into the cavity and on to the plywood, using a straight edge, my level, to check that the SculptWood had filled the cavity to approximately the level of the surrounding floor. Since the floor was to be finished with ceramic tile I felt the thick mortar under the tile would make further leveling unnecessary.
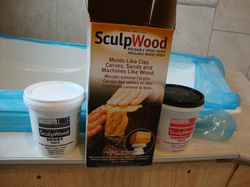
SculptWood
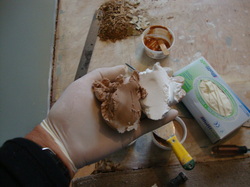
Part A and part B ready to be mixed. The spatula is in the background.
The finished repair, ready for ceramic tile.
So the job was complete, a good time to now read the SculptWood directions! And I found that it is recommended that SculptWood be pressed in place and rough shaped by hand. Once the material has hardened it can be brought to its final shape using regular wood tools, rasp, chisel etc.
Because of the way the SculptWood had peeled off the plywood when I applied it with the spatula I was concerned about how well this material would adhere to the plywood. Thus, as a test, I pressed a lump of SculptWood onto a scrap of plywood and let it set. My concerns were unfounded, the lump of SculptWood could not be removed from the plywood!
All in all I was quite pleased with the way this repair went and I am confidant that the Cold Cure, plywood, SculptWood repair will last as long as the house will.
 RSS Feed