
Rear View Camera
Pretty hard to make a case for this indulgence. Call it redundancy, always a good strategy where boats are concerned.
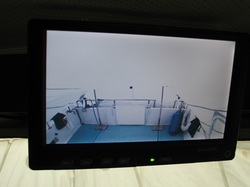
When steering from below, which I do frequently, as soon as it gets a bit rough, I cannot see behind the boat from where I sit to steer. The dingy mounted on the swim grid blocks my view. Thus to get a look behind I have to leave the wheel and go on deck to get a look over the dingy. Then the boat would get off course, quite quickly if it was a little rough, thus the auto pilot was added. However applying the principle of redundancy the camera will eliminate the necessity of going on deck, however if I do have to go on deck I have the auto helm.
I had actually played around with some rearview mirror ideas, none of which worked. Then I came across an article on rear view cameras in DIY Boat Owner magazine.
These cameras are made for RV’s, buses, and vehicles in general so I knew there would be some issues during the install. The magazine article was well researched so I felt confident going with their recommendations. My email with the few questions I had was quickly answered, another good sign. (www.rearviewcamera.net)
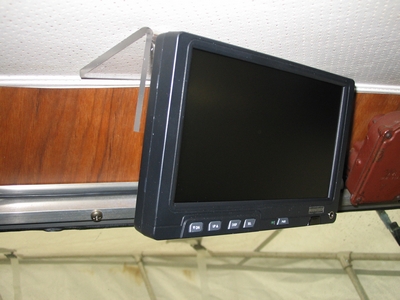
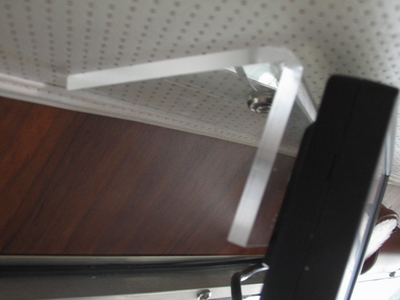
The monitor mount that came with the kit was made for vehicles. A ceiling mount of 1/4″ Plexiglas was easily fabricated, attached to the ceiling, and the monitor attached to the mount. No trick here, but doing things like this in plastic sure makes it easy.
Pretty hard to make a case for this indulgence. Call it redundancy, always a good strategy where boats are concerned.
When steering from below, which I do frequently, as soon as it gets a bit rough, I cannot see behind the boat from where I sit to steer. The dingy mounted on the swim grid blocks my view. Thus to get a look behind I have to leave the wheel and go on deck to get a look over the dingy. Then the boat would get off course, quite quickly if it was a little rough, thus the auto pilot was added. However applying the principle of redundancy the camera will eliminate the necessity of going on deck, however if I do have to go on deck I have the auto helm.
I had actually played around with some rearview mirror ideas, none of which worked. Then I came across an article on rear view cameras in DIY Boat Owner magazine.
These cameras are made for RV’s, buses, and vehicles in general so I knew there would be some issues during the install. The magazine article was well researched so I felt confident going with their recommendations. My email with the few questions I had was quickly answered, another good sign. (www.rearviewcamera.net)
The monitor mount that came with the kit was made for vehicles. A ceiling mount of 1/4″ Plexiglas was easily fabricated, attached to the ceiling, and the monitor attached to the mount. No trick here, but doing things like this in plastic sure makes it easy.
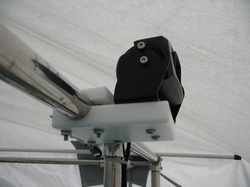
The outside camera mount involved a little more work. The kit came with a camera mount to go on a flat surface. A platform for the camera mount was fabricated, that would then attach to the rear rail of the upper deck. The cord from the camera would go into the cabin through a hole drilled in the cabin wall. However the cord from the camera is not very long and if the camera was mounted on top of the rail it was very tight to get it through the hole. Thus I opted for a lowered platform design, which lowered the camera by about 1″, but this was all I needed. For the platform I used 1/2″and 3/4″ cutting board material because that was handy, but I could have used UHMW or Starboard. The upper and lower pieces were grooved out to take the 1″ railing, and then bolted together and then the camera mount attached to the platform.
Again this was a very easy fabrication. The trick is to think of plastic as an option for dealing with these situations. Drop in and see us!
Again this was a very easy fabrication. The trick is to think of plastic as an option for dealing with these situations. Drop in and see us!
 RSS Feed