
This project does not involve any materials or services from PlasticWorks but it does deal with fiberglass.
The rear deck of my boat has 2 large hatches. Inset at the edge of each hatch is a gutter or trough that handles any rain or wash water. In the gutter of each hatch are 2 drains that take the water from the gutter, through a hose, and out via a through hull installed above the water line. The problem is that these drains are small, make a right angle immediately below the deck, and plug very easily with sea gull crud that I seem to get more than my share of. As a result I get a lot of rain water that ends up in the bilge. There is a very active web site for Tollycraft owners so I went there to state my problem and seek advice or comments about reworking the drains. What comments I got were very negative, basically that I was entering into unknown territory, no one seemed to have tackled this problem. So for a year I set the problem aside and went on to other projects.
The rear deck of my boat has 2 large hatches. Inset at the edge of each hatch is a gutter or trough that handles any rain or wash water. In the gutter of each hatch are 2 drains that take the water from the gutter, through a hose, and out via a through hull installed above the water line. The problem is that these drains are small, make a right angle immediately below the deck, and plug very easily with sea gull crud that I seem to get more than my share of. As a result I get a lot of rain water that ends up in the bilge. There is a very active web site for Tollycraft owners so I went there to state my problem and seek advice or comments about reworking the drains. What comments I got were very negative, basically that I was entering into unknown territory, no one seemed to have tackled this problem. So for a year I set the problem aside and went on to other projects.
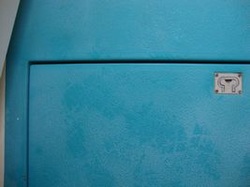
Deck hatch fits into drain gutter.

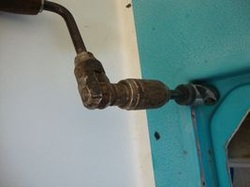
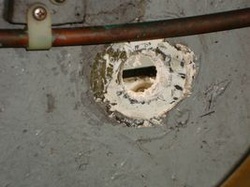
The original drain - hatch cover removed
This fall I put on the winter cover, which of course eliminates the problem because no rain or sea gull crud gets on the deck. However the winter cover also allows me to work under cover, so lets take a run at this problem. I had lots of paper schemes that went no where, I tried to fabricate some small fiberglass drains with a 90 degree bend but the hose connection never turned out right and I never did try and install them. Eventually I settled on a bronze fitting, threaded on one end and sized for a 1″ hose on the other end. My plan was to wax up the threads and cast a fiberglass plug. The fitting could be twisted out and the plug glassed in place under the deck then the fitting reinstalled. However before I could act on this plan I came across a reasonably priced tap, so why not try and tap directly into the deck? Even if it did not work I could go back to my original plan.
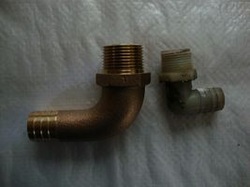
The new drain fitting and the original one.
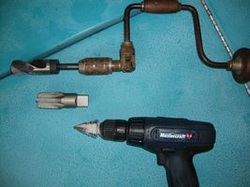
The tools: hand brace with twist drill, the tap and battery drill with step bit for enlarging hole for through hull.
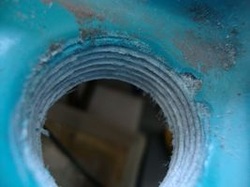
The original drains were twisted out (were they tapped in when the boat was built or was some other technique used?). The tap called for a 1- 5/32 ” hole, but the only reasonable readily available bit I could put my hands on was 1-3/16″ so I would go with that. I was aware that taking a big hole (the existing one) and trying to make it bigger using a twist bit would probably lead to a three sided hole; I had just had this problem recently while trying to enlarge a hole in some plastic. My plan was to drill the hole by hand and eliminate the chatter a battery or power drill would create. I rigged the bit in a hand brace and proceeded to enlarge the hole. The bit had to be backed up frequently to keep it from biting in too much, and downward pressure was minimal, but in a few minutes I had a new, enlarged, perfectly round hole.
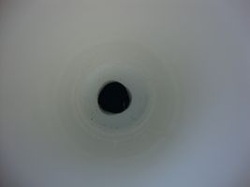
Widening a hole with a twist drill can result in chatter, leading to a three sided hole, as happened in this other project.
Using the hand brace to widen the hole I hoped to get a round hole that I could use the tap on.
Next to tap the hole. The fiberglass deck at the location of the hole was reasonably thick, and this helped the tap start easily. The tap was turned with a wrench, with as much downward pressure as my other hand could muster. Turning the tap required a lot of muscle, however the tap did seem to be cutting the fiberglass as opposed to pushing it aside and forcing its way in. At this point I was committed, if the deck cracked I would deal with that later. It was going so well I forgot to get a picture of the tap in action.
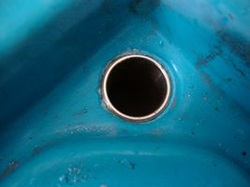
I now have a threaded hole in the deck, ready for the new drain.
The new bronze drains turned in easily, but did require quite a bit of force to get them up to the top of the deck. I am not certain this technique would have worked if I had started with the 1-5/32″ hole recommended. I put a bit of caulking on the threads when I was screwing them in and a bit more on the underside of the deck. I will check them later and may put more caulking on the underside when the weather warms up.
New drain screwed in place.
New drain from below deck.
Next was to replace the existing through hulls with new ones sized for the 1″ hose. The through hulls were reasonably accessible and did not require more than the normal amount of contorting and positioning yourself in unnatural positions. The visible caulking was scraped away and the backing plates screwed off and the old through hulls pushed out. The holes in the sides of the hull were enlarged using a step bit and a battery drill, working from the dock on one side and from the dingy on the other side. New through hulls were then installed, and 1″ I.D. hose connected to the new drains and the new through hulls.
Original through hull removed. Hole was enlarged with step bit working from the outside.
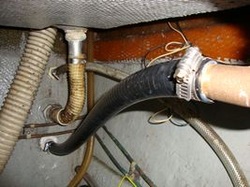
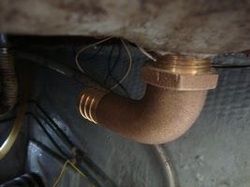
The new drain, with hose connecting to the new through hull. (Reminder, must clean or replaces some of those other hoses.)
For the new system the most restrictive point is the I.D. of the through hull at .75 inches. The I.D. of the old through hull was .45 inches. Thus the new system produces a cross sectional area of .44 sq. inches, as compared to the original of .16 sq. inches, an almost 3 fold increase, and the sharp right angle bends are replaced with the sweeping curve of the bronze units.
This was one of those projects where everything went right the first time. We need that every once in a while don’t we? Maybe the next project will go the same way.
This was one of those projects where everything went right the first time. We need that every once in a while don’t we? Maybe the next project will go the same way.
 RSS Feed